Looking for a way to display your Shopify store's real-time sales data? The EleksCava-Shopify is an ESP32-powered e-ink display that shows your daily sales, order counts, and more — right on your desk.
What is EleksCava-Shopify?
EleksCava-Shopify is a compact e-ink sales display designed specifically for Shopify store owners. It connects to your store via the Shopify Admin API and displays real-time sales metrics on a low-power 2.9" e-ink screen.
Key Features
| Feature | Description |
|---|---|
| Real-time Sales Display | Shows today's revenue and order count |
| Order Counter | Configurable timeframe (today, week, month, year, all-time) |
| New Order Alerts | Plays a notification sound when new orders come in |
| Auto Timezone Sync | Automatically syncs with your Shopify store's timezone |
| Multi-Currency Support | Displays sales in your store's currency |
| Low Power Consumption | E-ink display only uses power when refreshing |
What You'll Need
- ✓ An EleksCava device
- ✓ Admin access to your Shopify store
- ✓ A 2.4GHz Wi-Fi network (5GHz is not supported)
- ✓ A smartphone or computer for configuration
How to Get Your Shopify Admin API Access Token
To display your Shopify sales data, EleksCava needs an Admin API access token. Follow these 7 steps to create a custom app and generate your token.
Step 1: Open Apps and Sales Channels
First, navigate to your Shopify app settings:
- Log in to your Shopify Admin dashboard
- Click Settings in the bottom-left corner
- Select Apps and sales channels
- Click Develop apps (you may need to enable developer preview first)
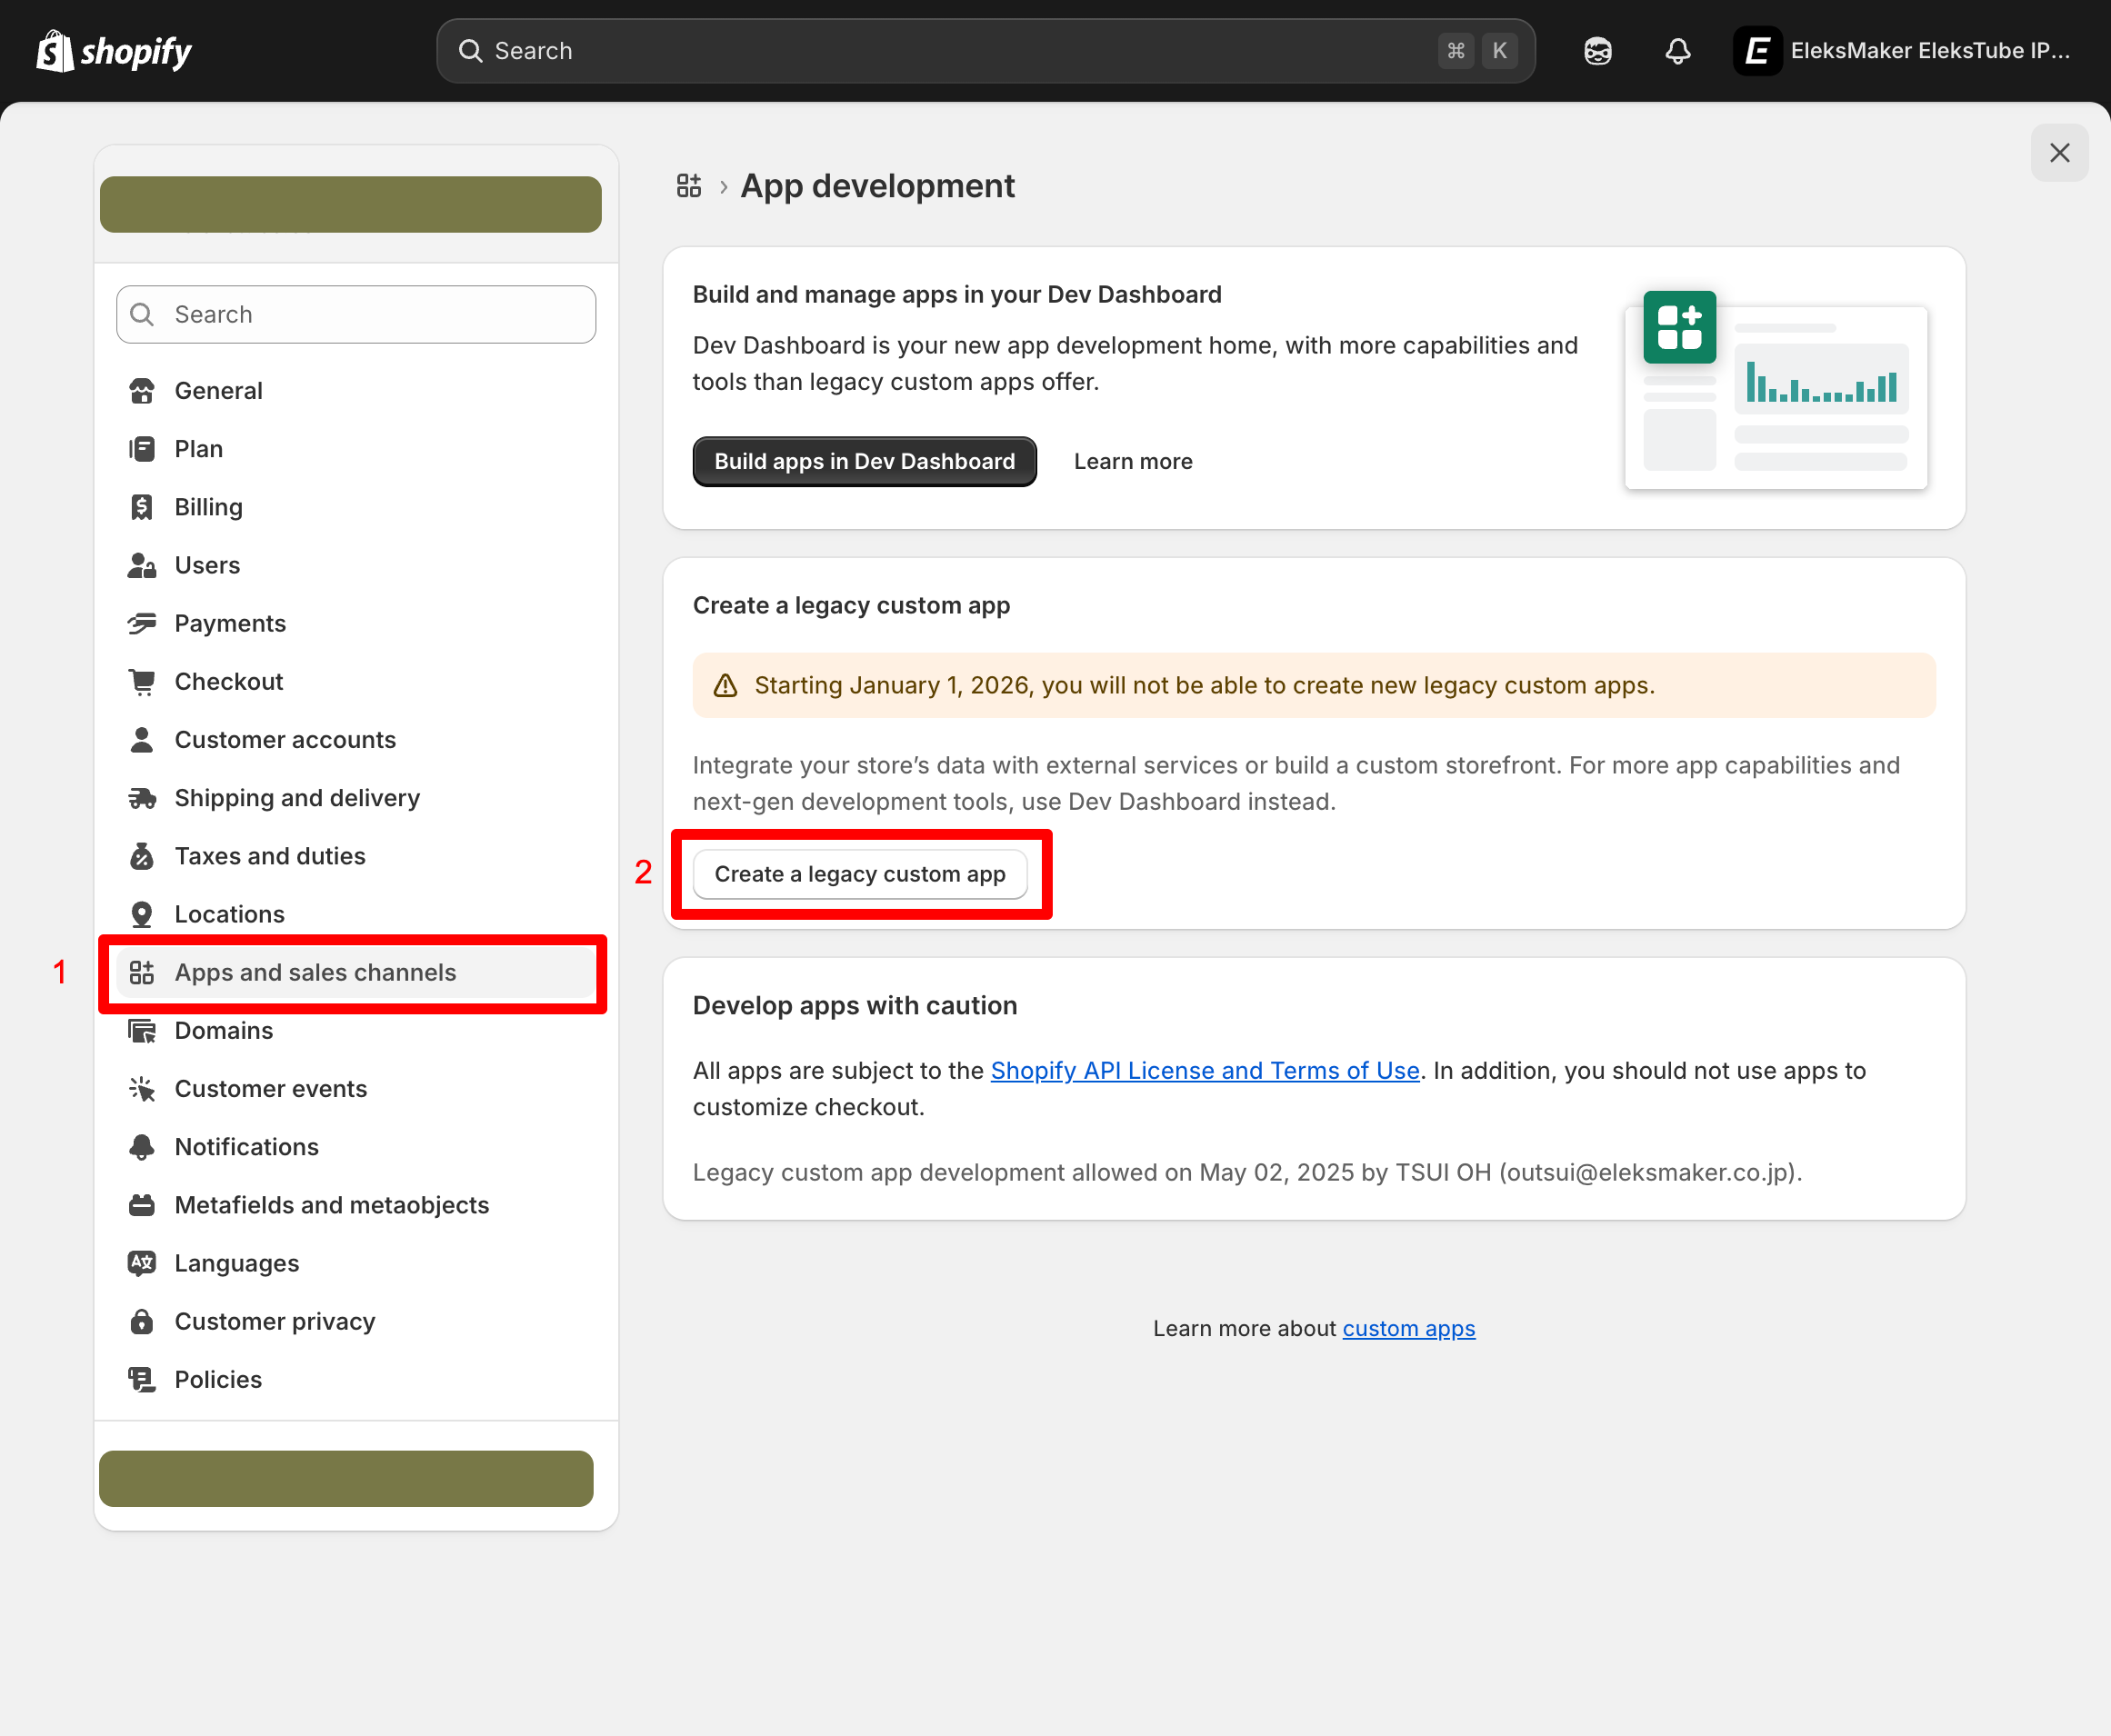
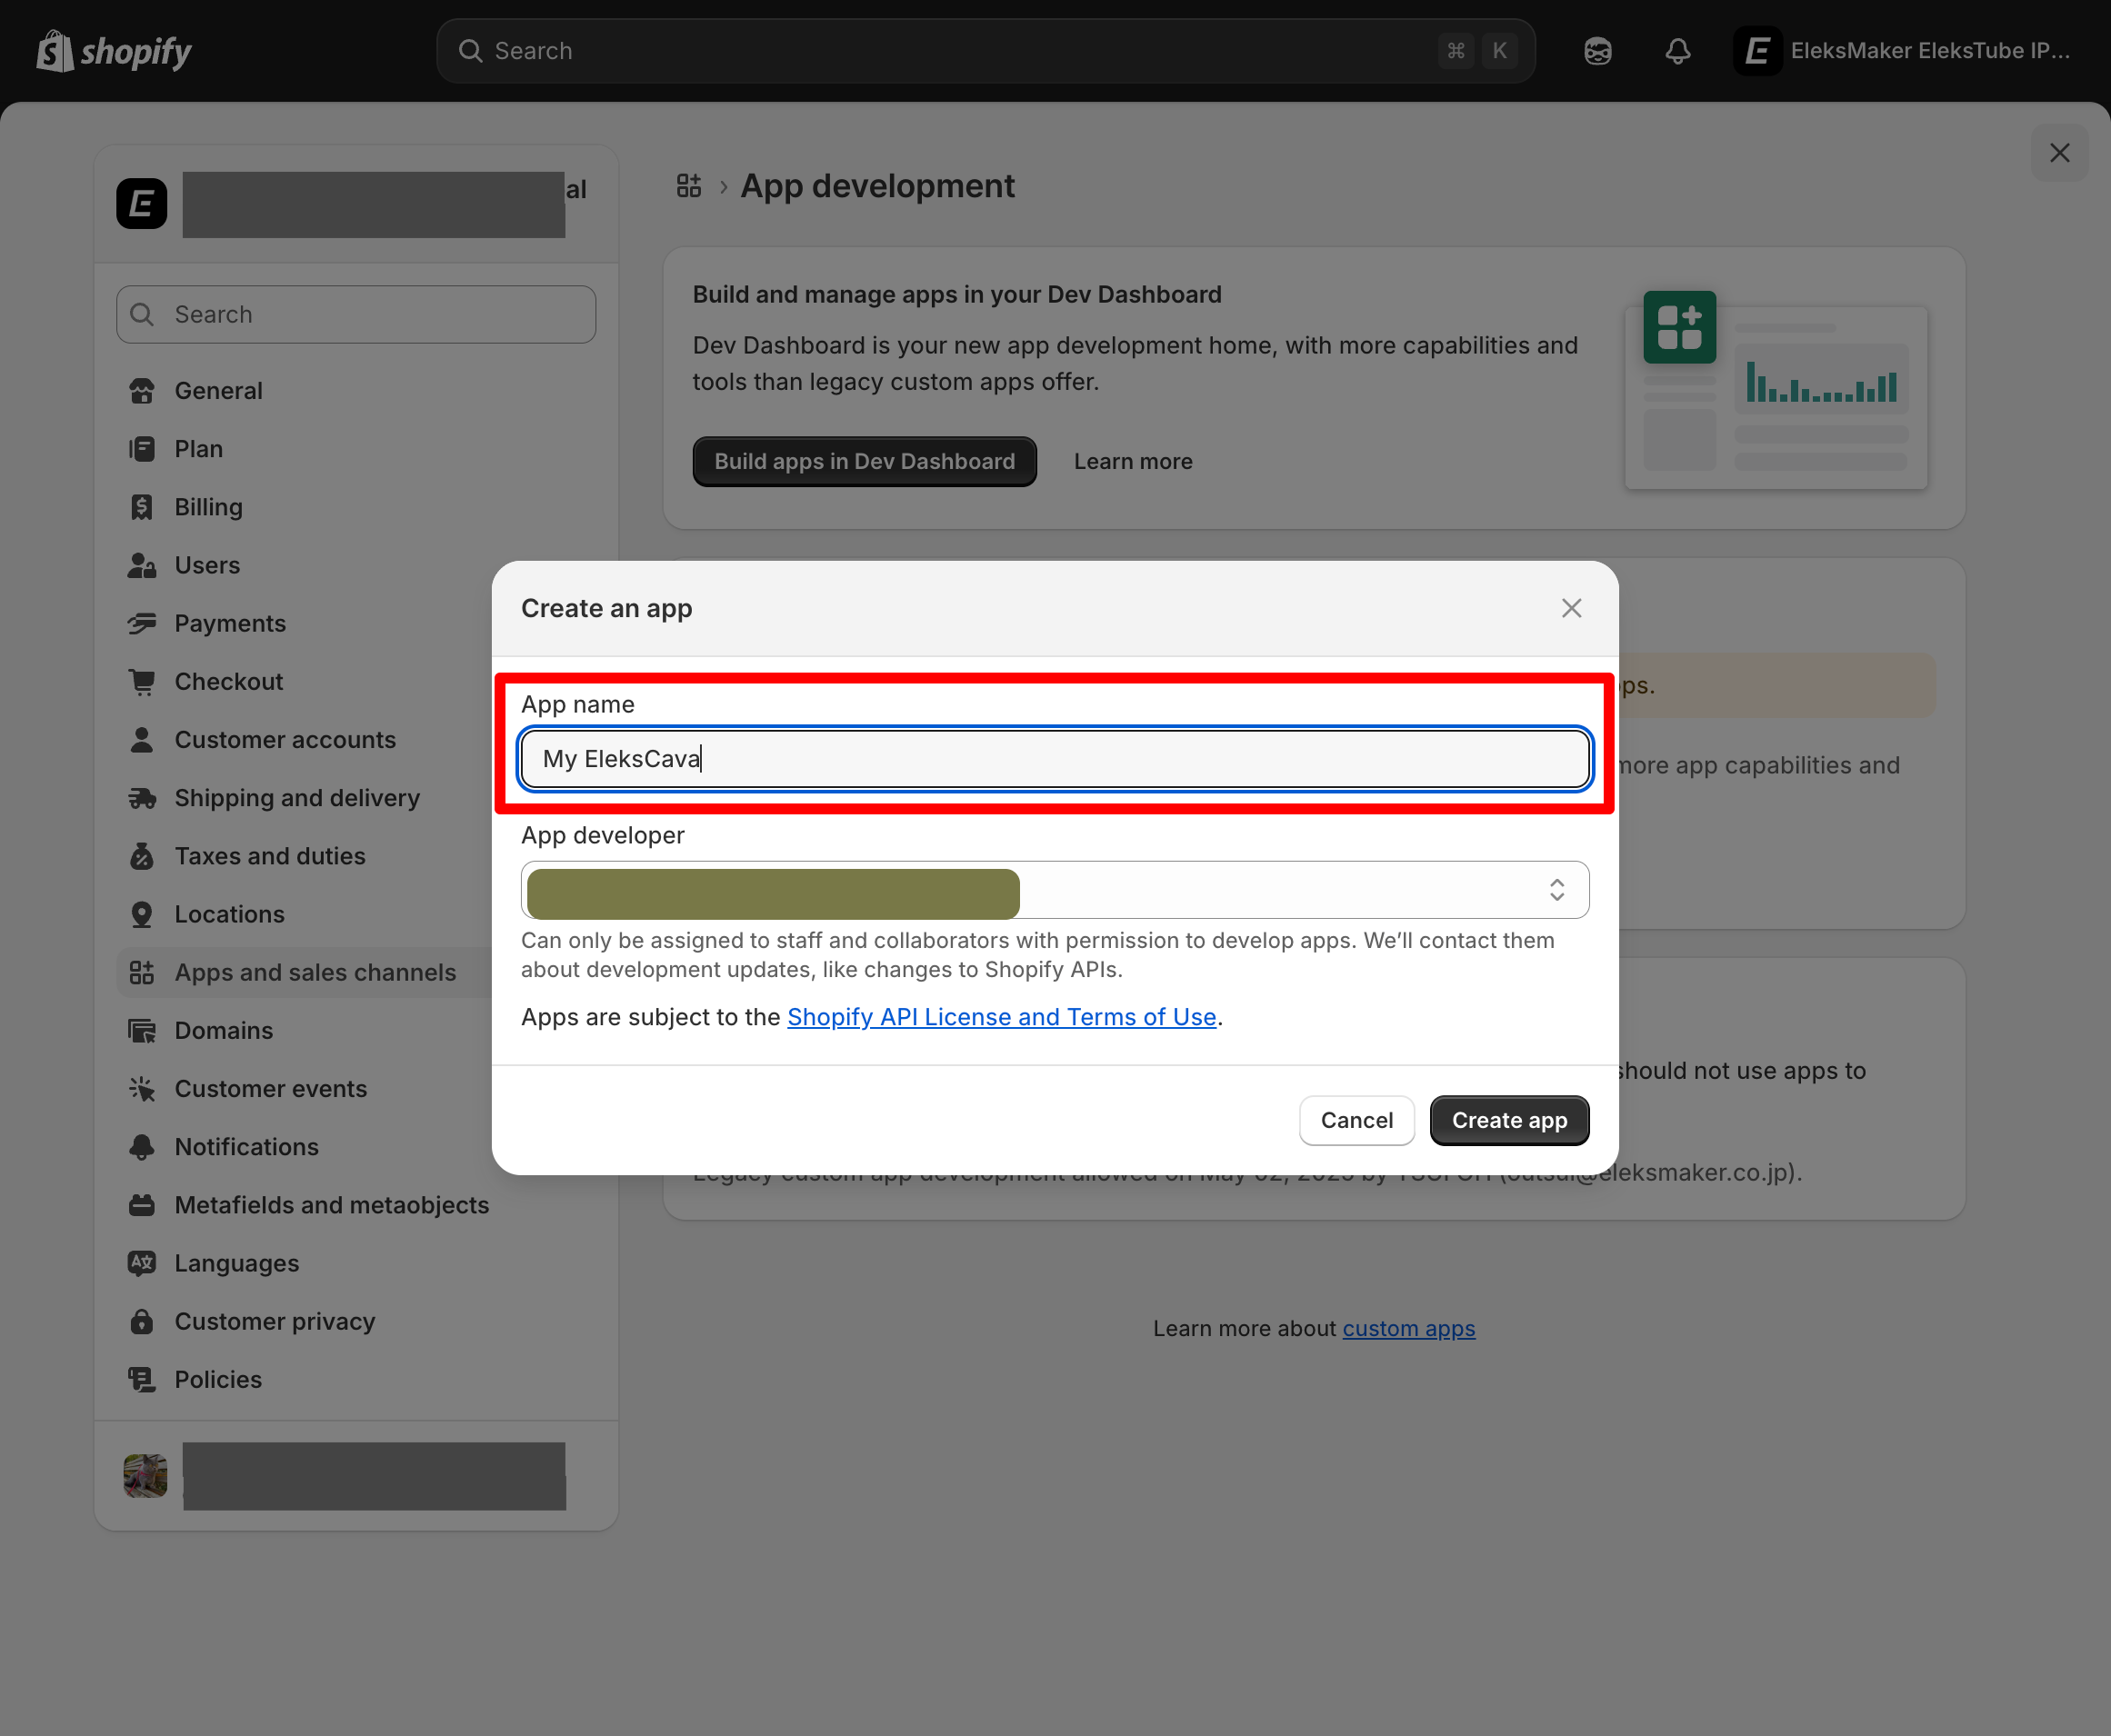
Step 2: Create a Legacy Custom App
Now create a new app for EleksCava:
- Click Create a legacy custom app
- Enter an app name (e.g.,
EleksCava Sales Display) - Click Create app
Important Notice
Shopify will discontinue legacy custom apps after January 1, 2026. We recommend setting up your device before this date.
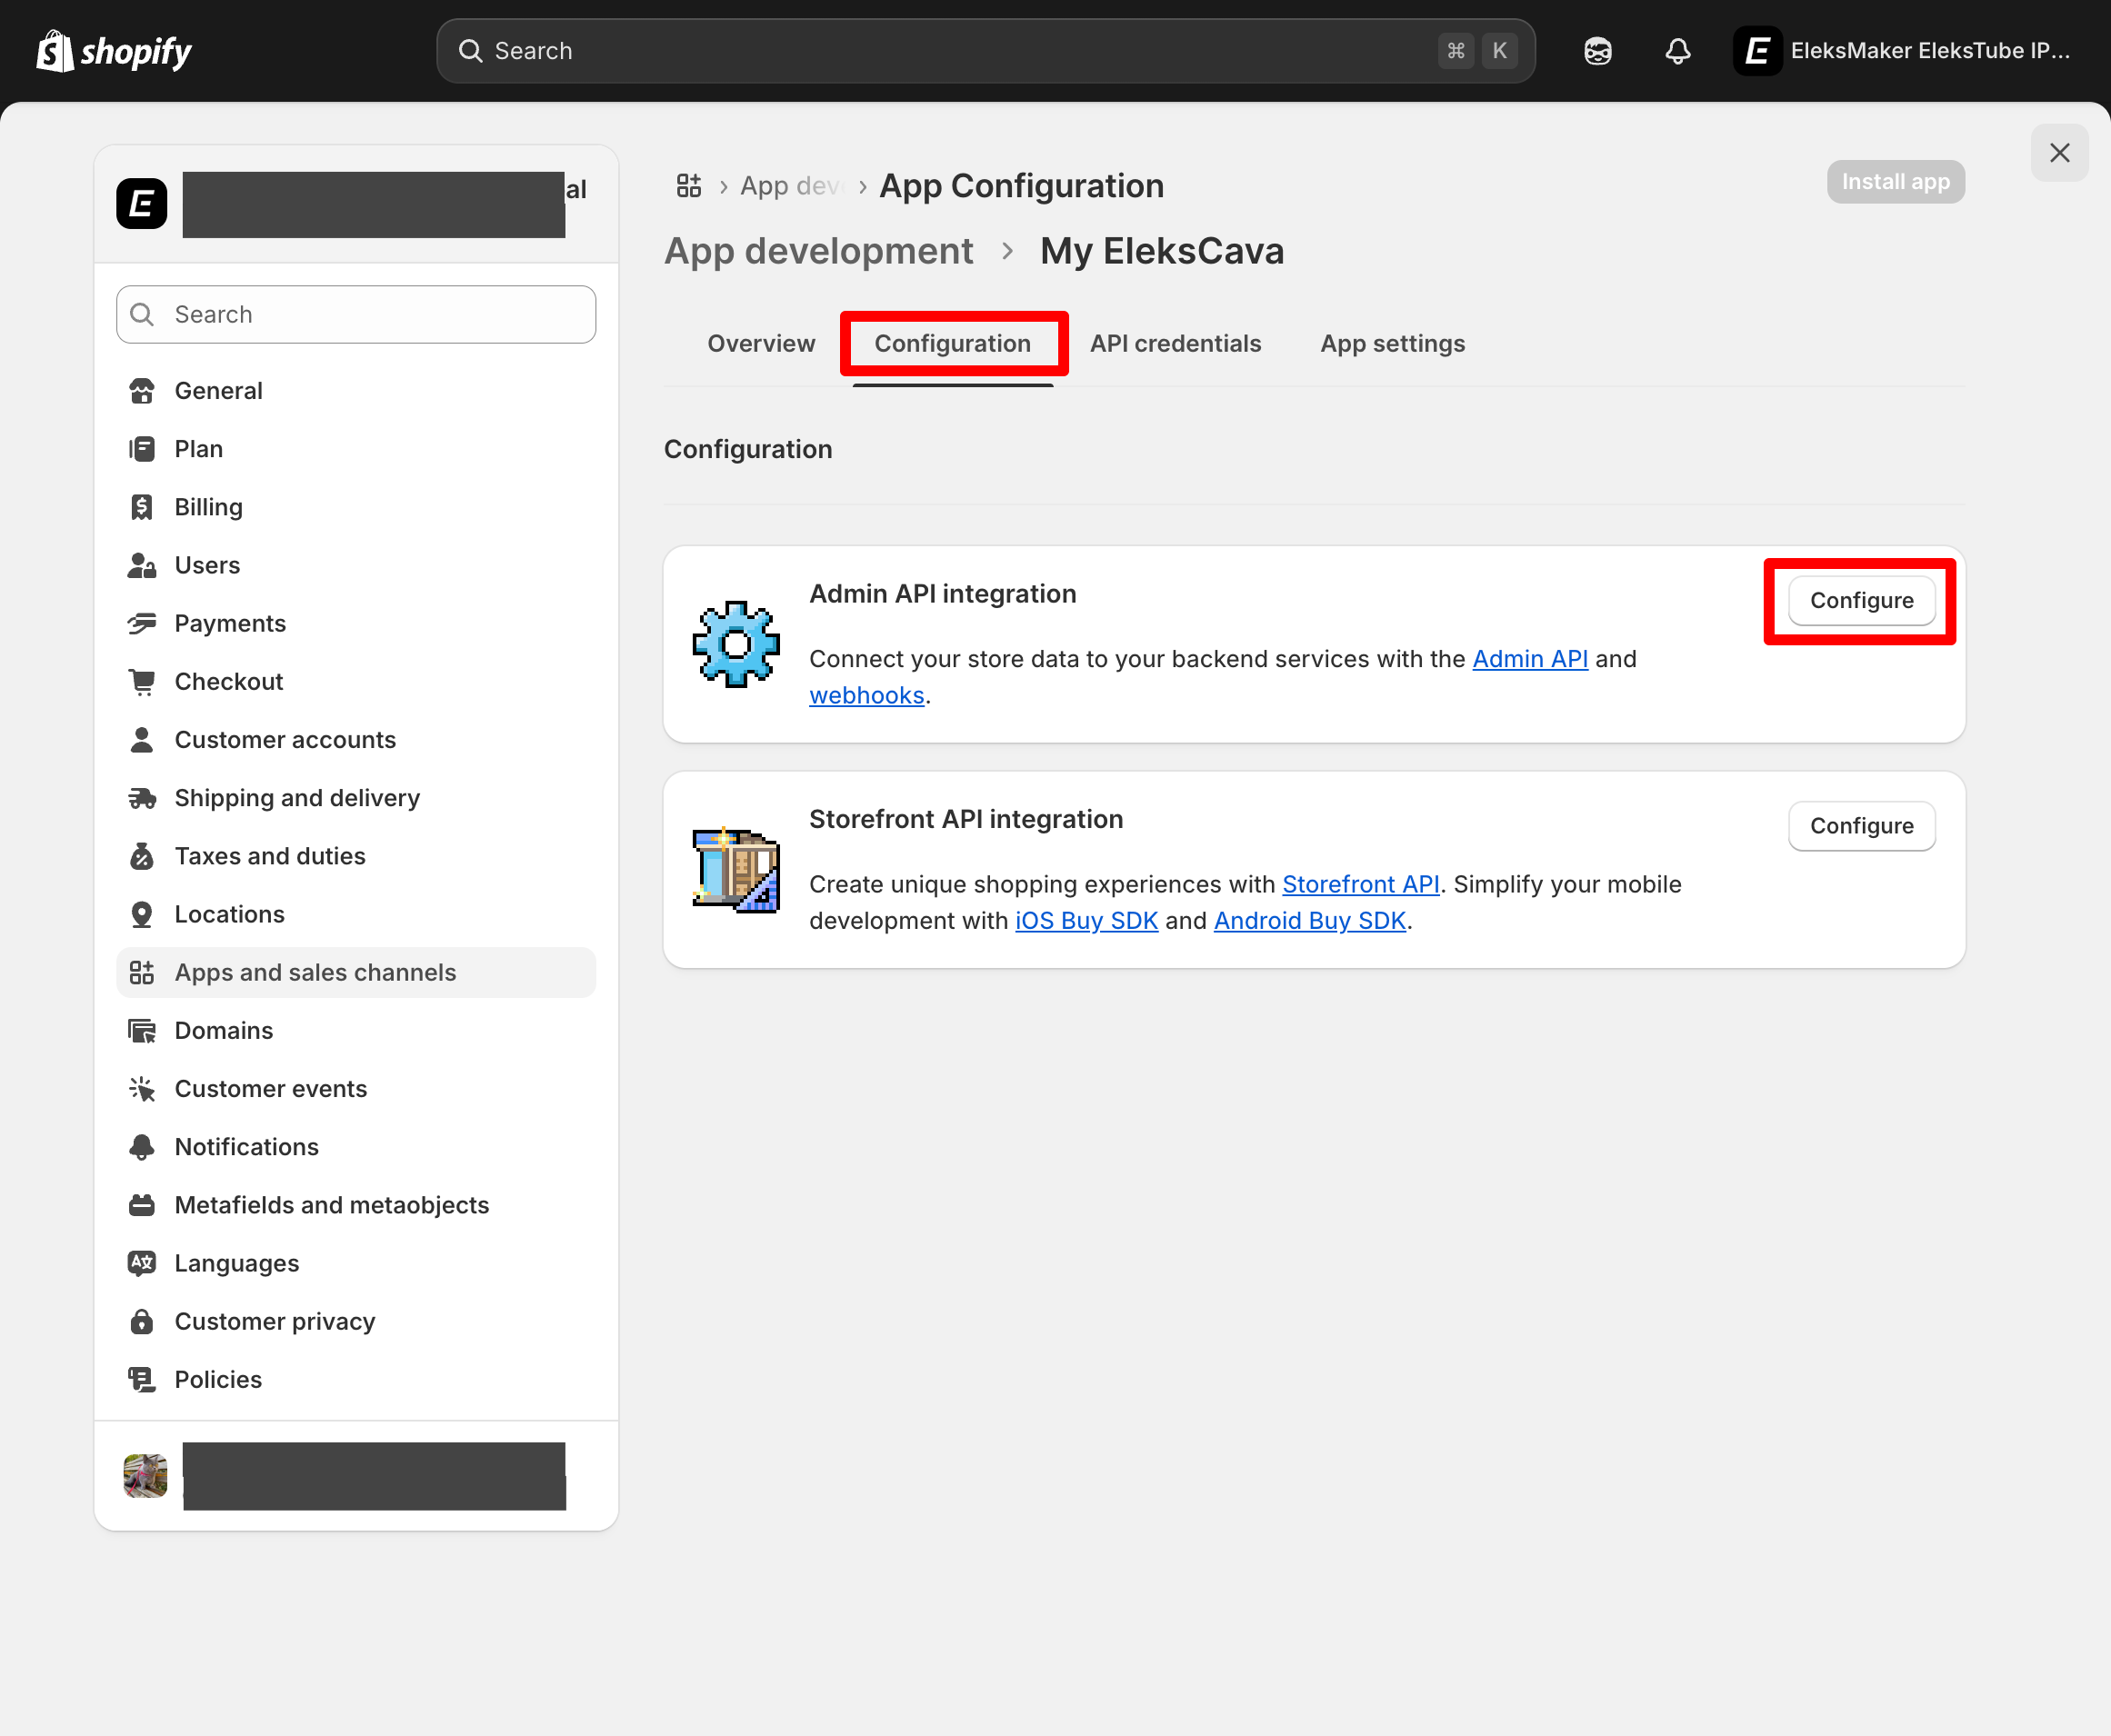
Step 3: Configure Admin API Integration
Next, enable the Admin API for your app:
- Open the Configuration tab
- Find Admin API integration
- Click Configure
Step 4: Enable Order Reading Permissions
EleksCava needs permission to read your order data:
- Scroll down to the Orders section
- Check the box for read_orders
- Click Save in the top-right corner
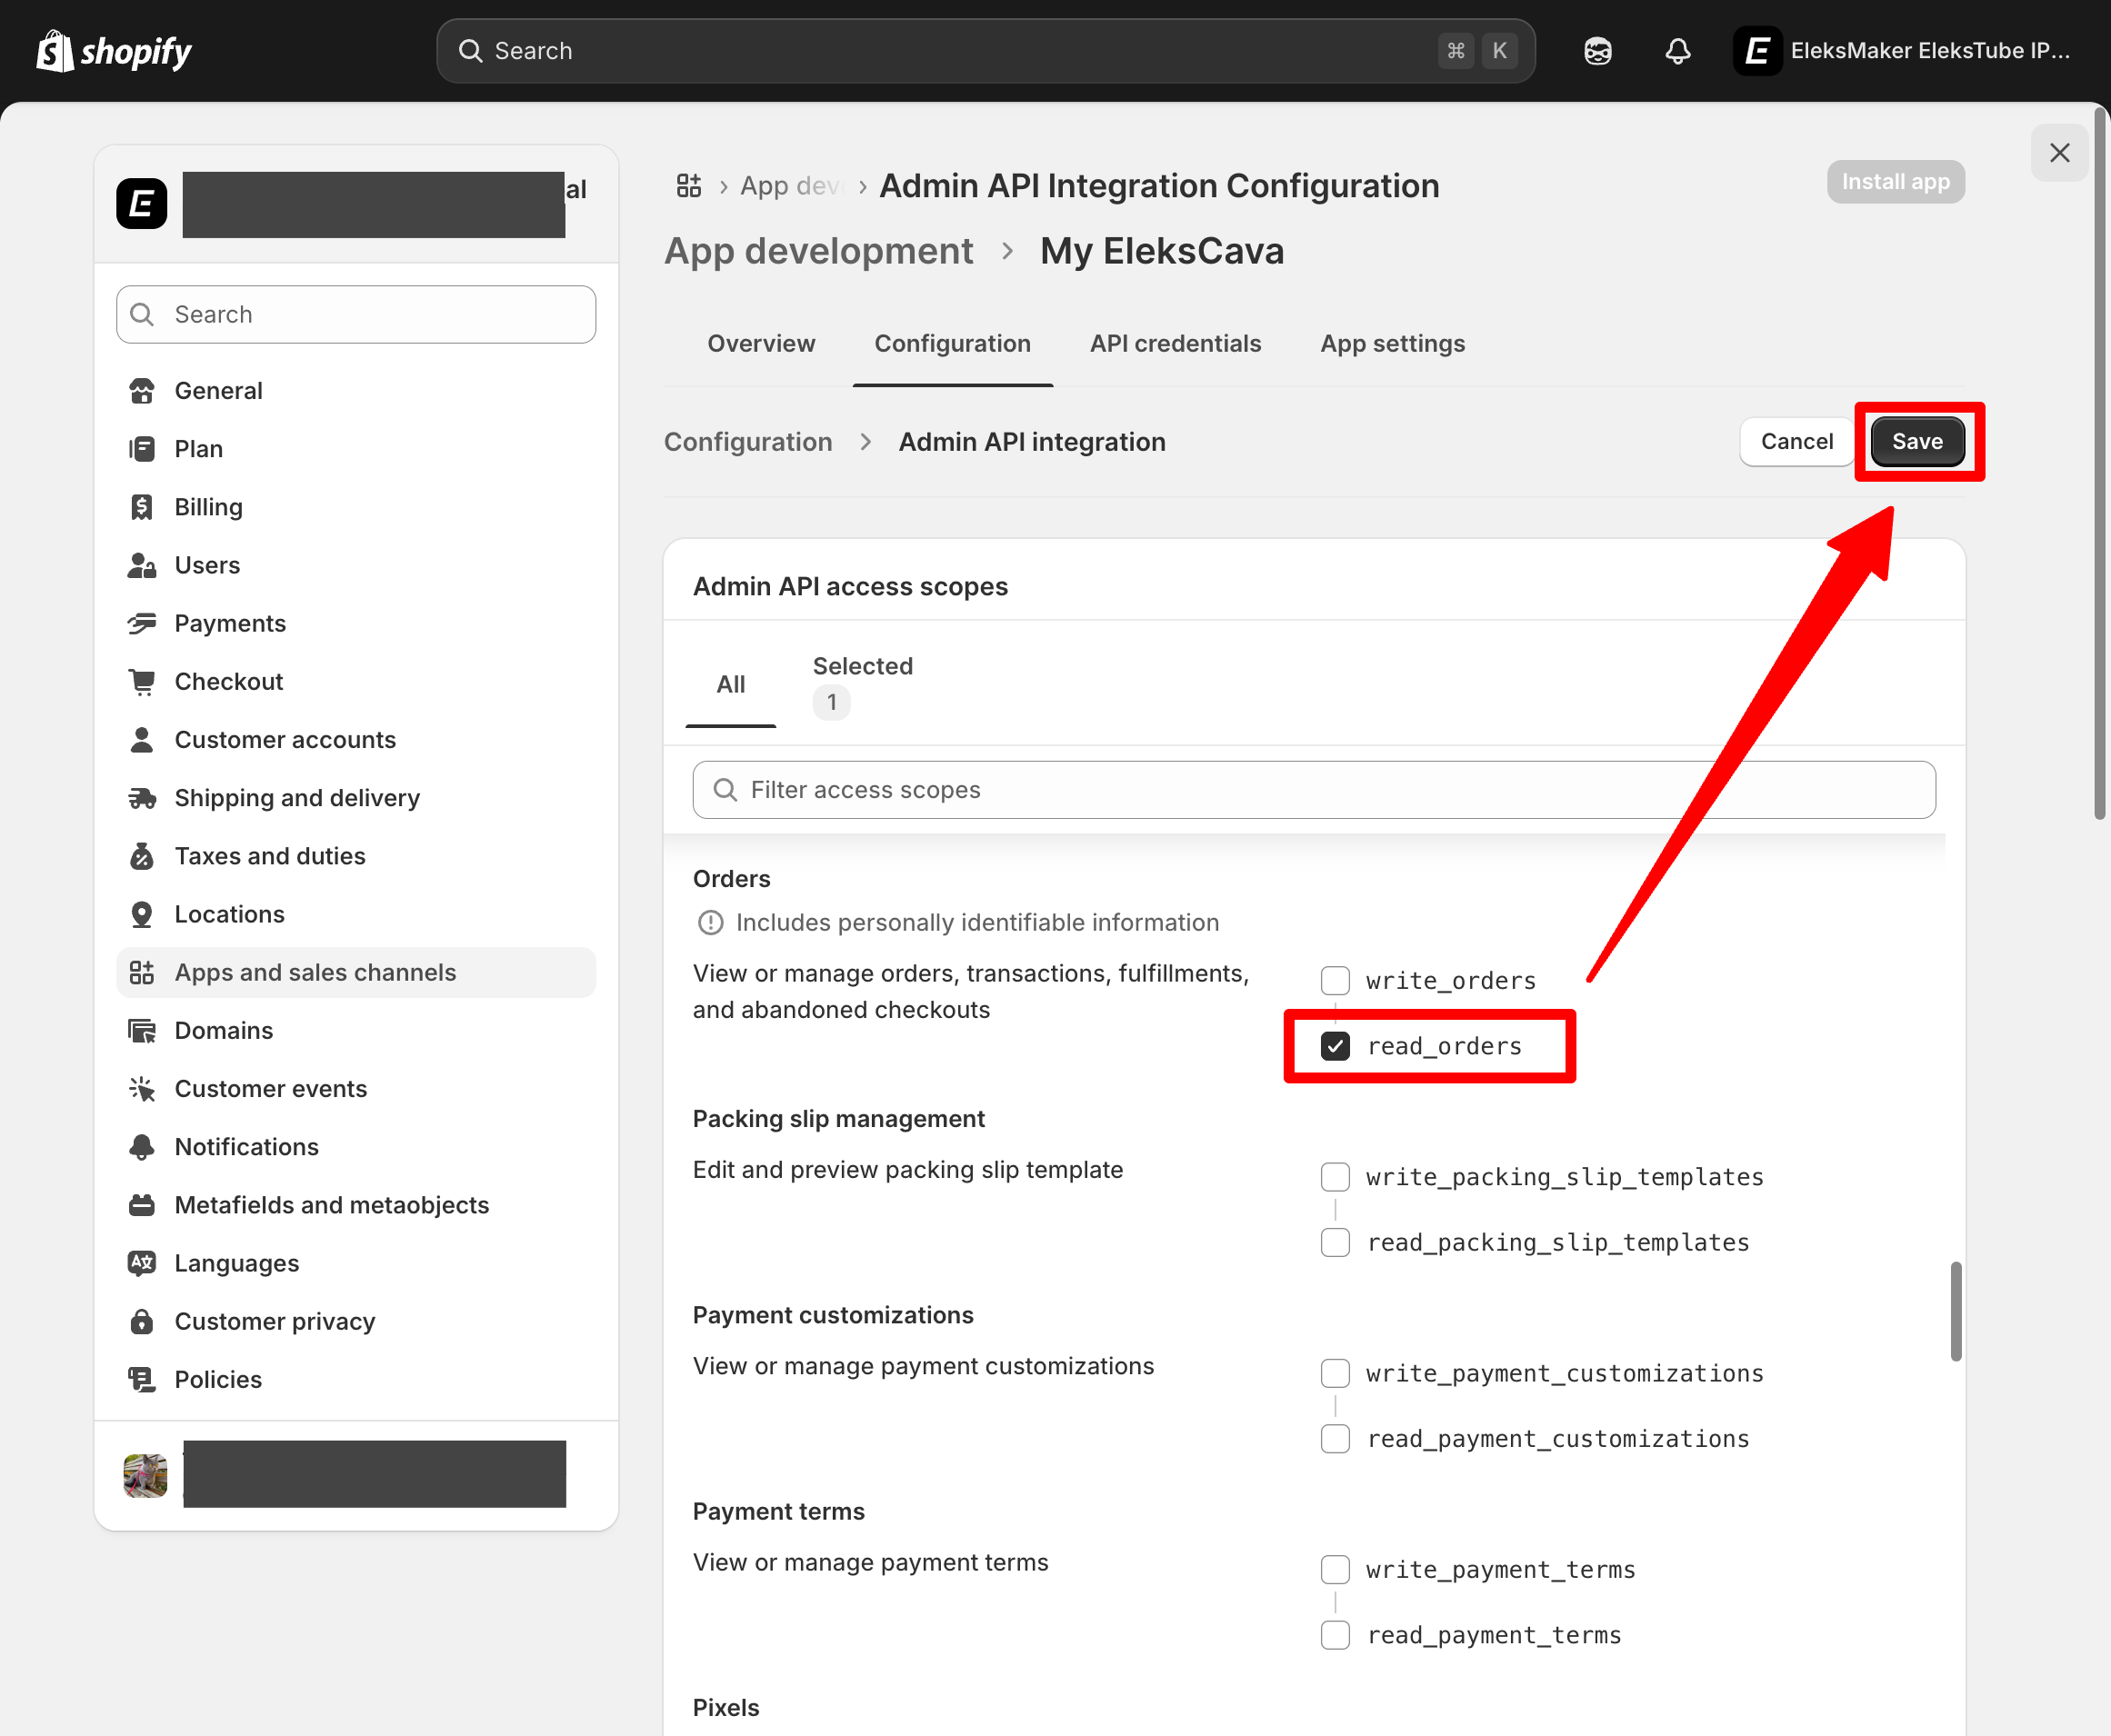
This is the only permission EleksCava needs. It cannot modify your orders or access other sensitive data.
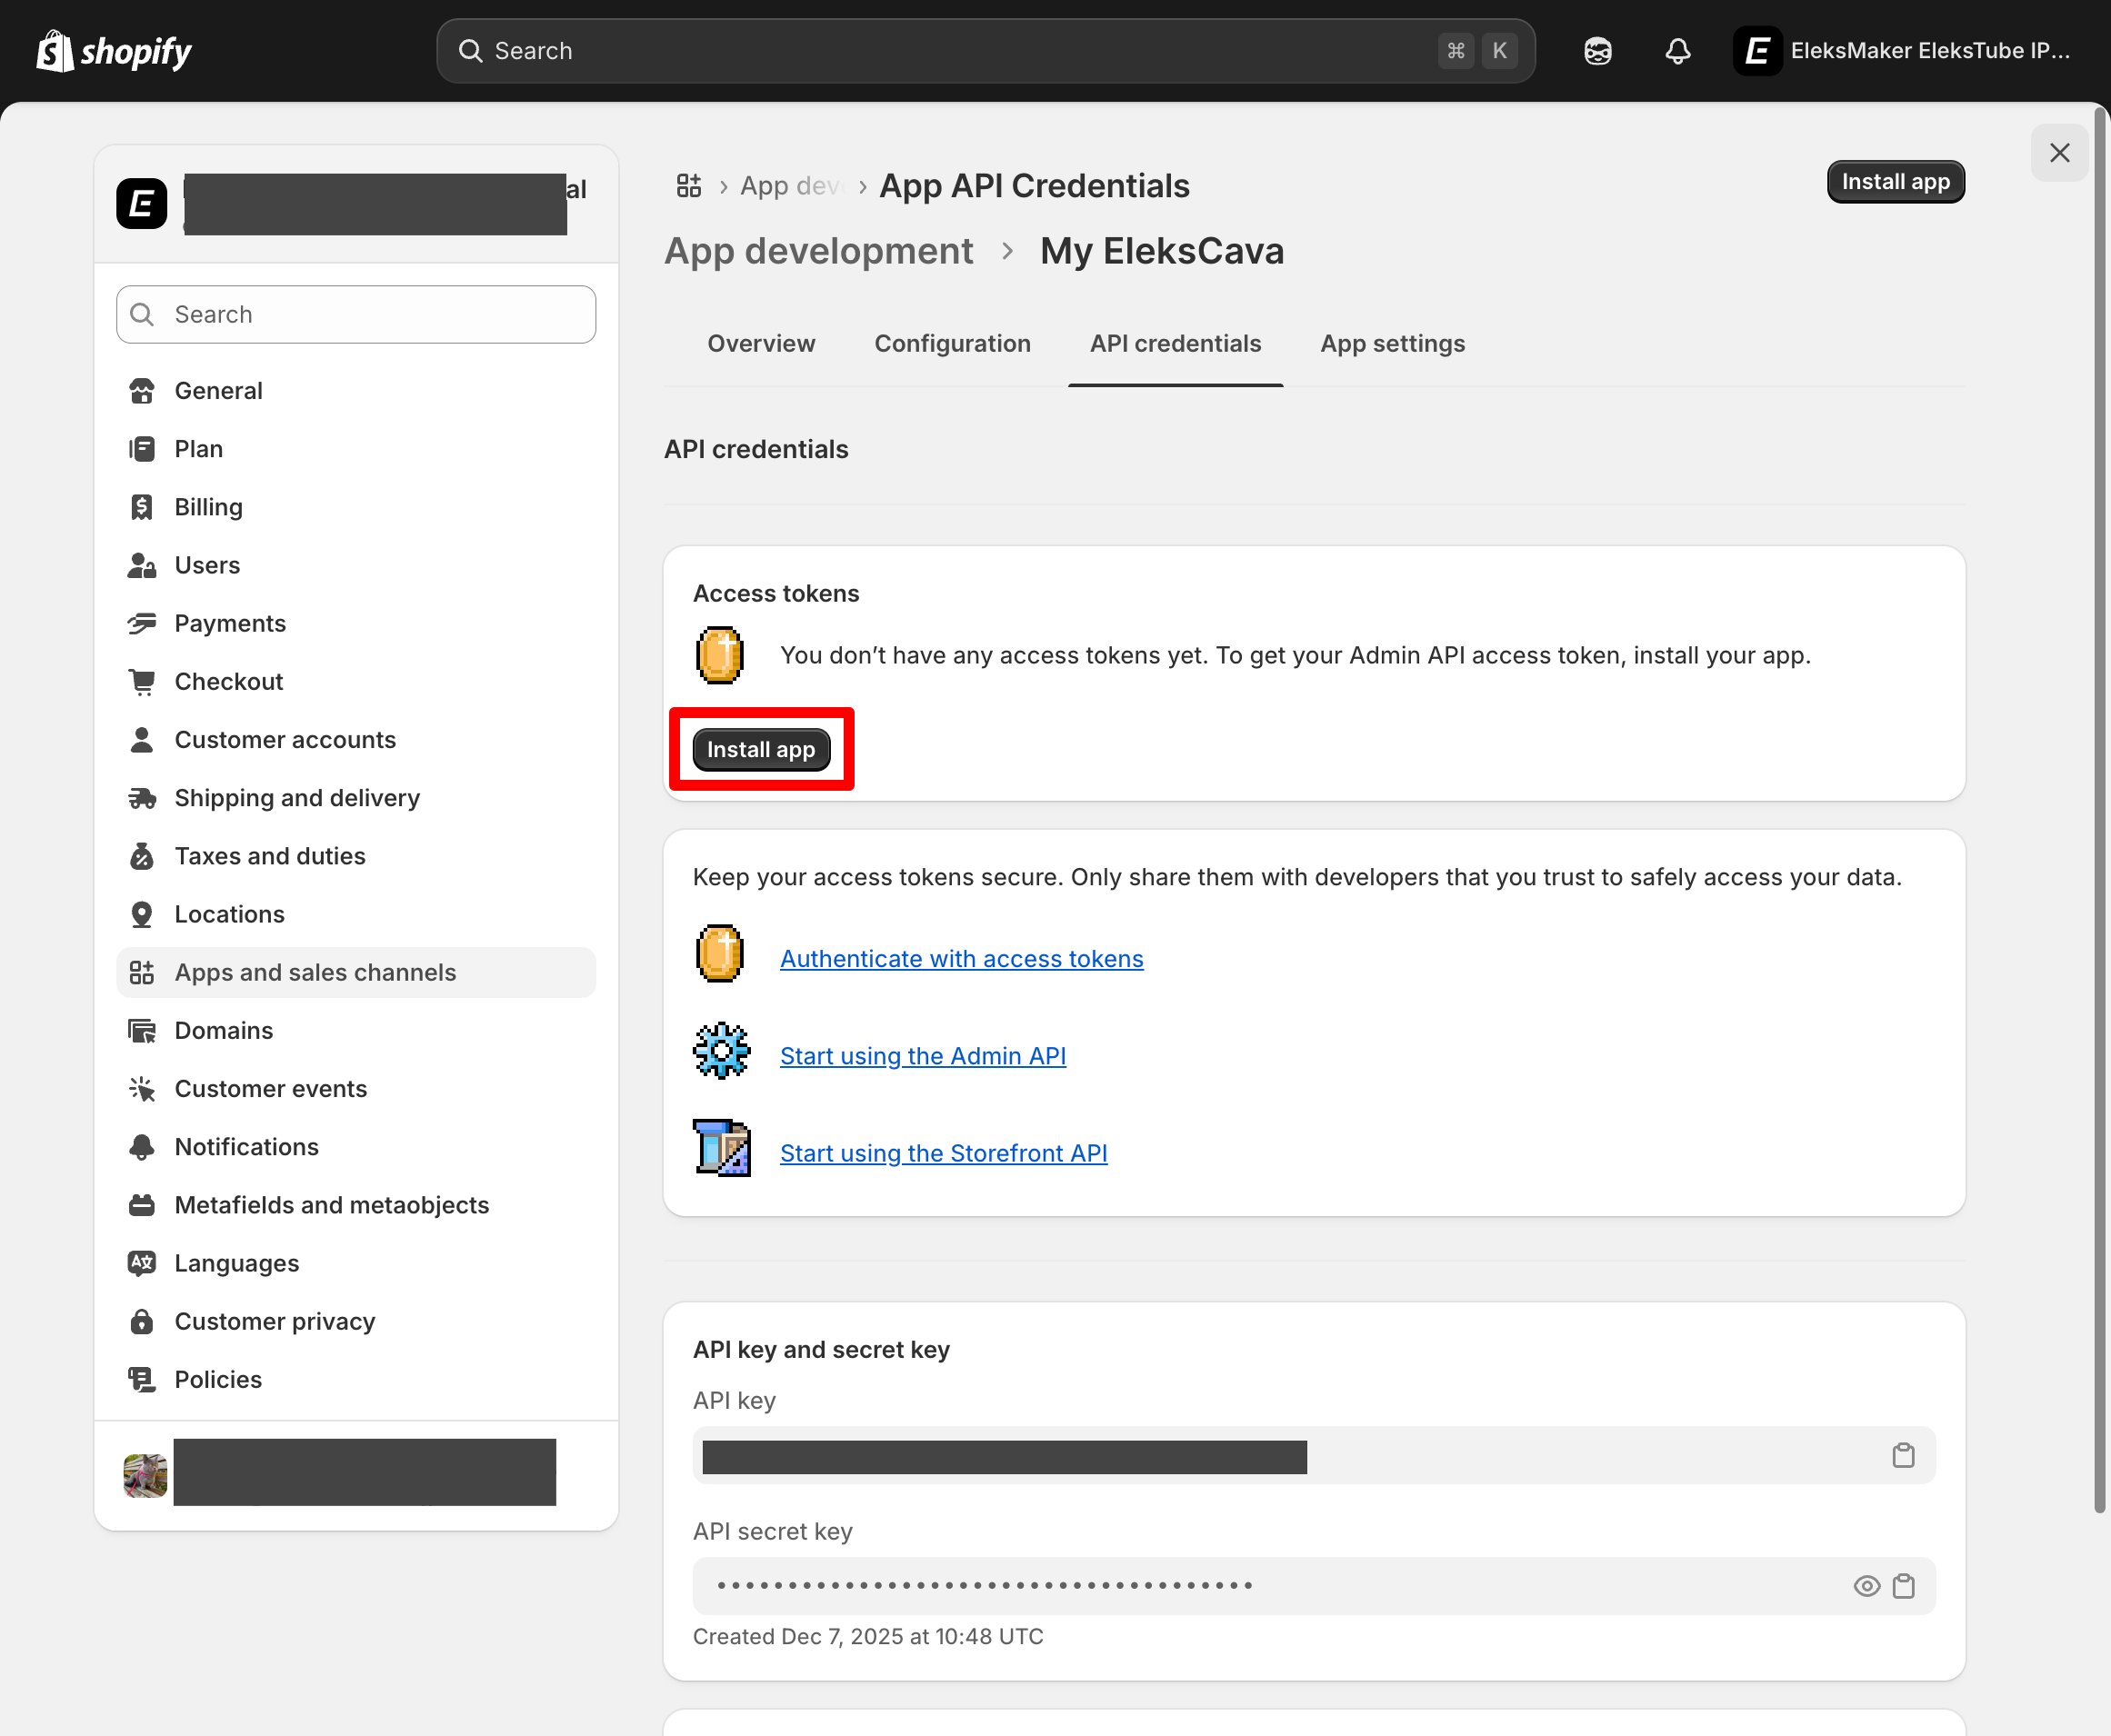
Step 5: Install the App
Before Shopify generates an access token, you must install the app:
- Go back to the Overview tab
- Click Install app
- Confirm the installation in the popup dialog
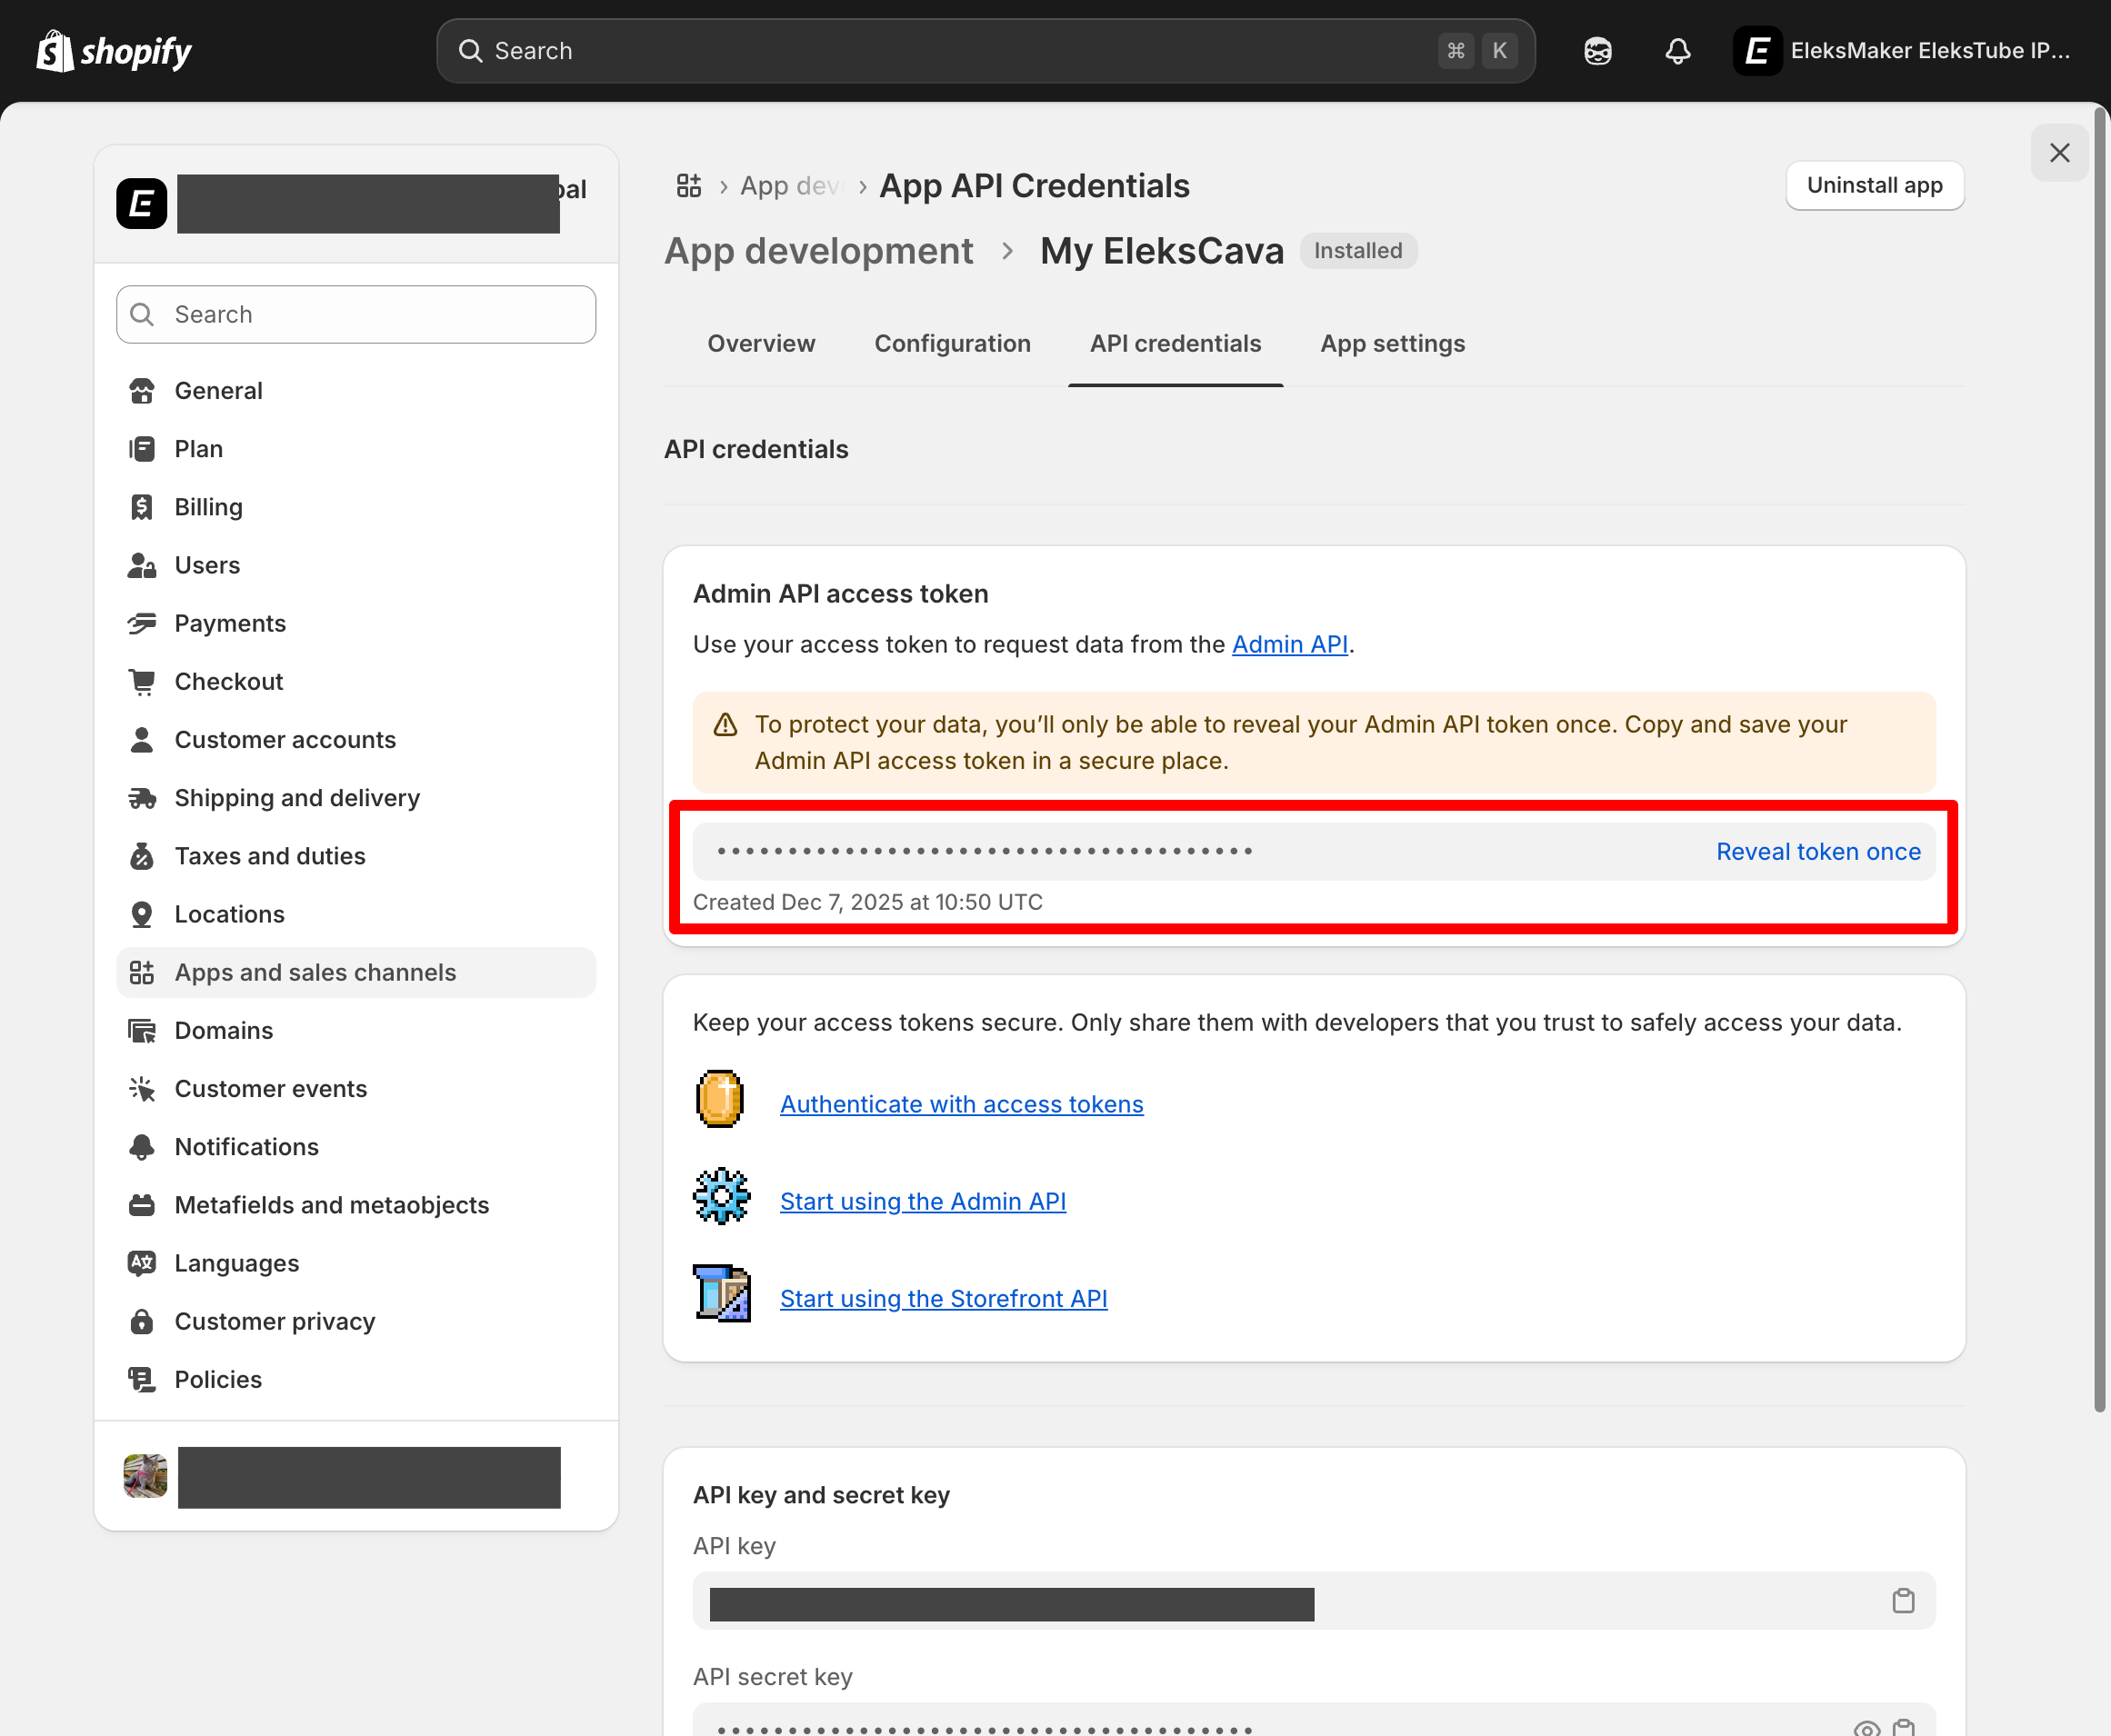
Step 6: Reveal and Copy Your Access Token
Now retrieve your Admin API access token:
- Navigate to the API credentials tab
- Find Admin API access token
- Click Reveal token once
- Immediately copy and save this token — Shopify will never show it again!
Security Tip
Your access token starts with shpat_ and should be kept confidential. Never share it publicly or commit it to version control.
Step 7: Note Your Store Domain
Finally, record your store information:
- Shop Domain:
your-store.myshopify.com(found in your browser's address bar) - Access Token: The
shpat_xxxxx...token you just copied
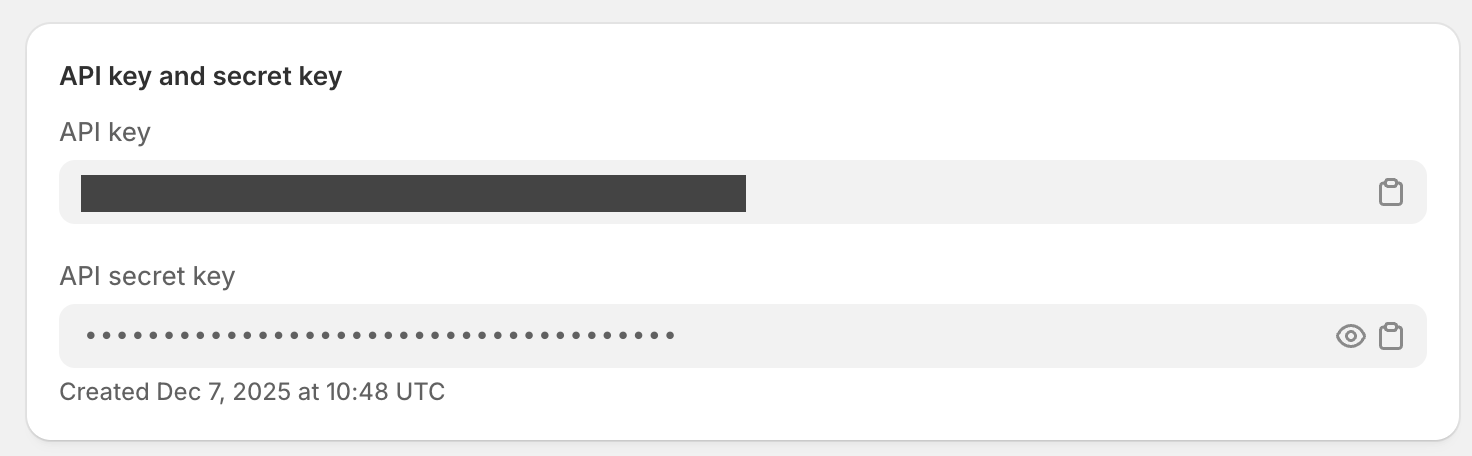
Shopify also displays API key and API secret key below the access token. These are not required for EleksCava's basic functionality.
Success!
You now have everything needed to connect EleksCava to your Shopify store.
How to Configure Wi-Fi on Your EleksCava Device
Before connecting to Shopify, your EleksCava device needs to join your Wi-Fi network.
Entering Configuration Mode
Your EleksCava enters AP (Access Point) mode automatically when:
- First power-on — No Wi-Fi has been configured yet
- Manual reset — Press and hold A + C buttons for 10 seconds
When in AP mode: the e-ink screen displays a QR code and connection instructions, and the RGB LED pulses blue.
Step 1: Connect to the EleksCava Hotspot
- Open Wi-Fi settings on your phone or computer
- Look for a network named EleksCava-XXXX (XXXX is your device's unique ID)
- Connect to this network (no password required)
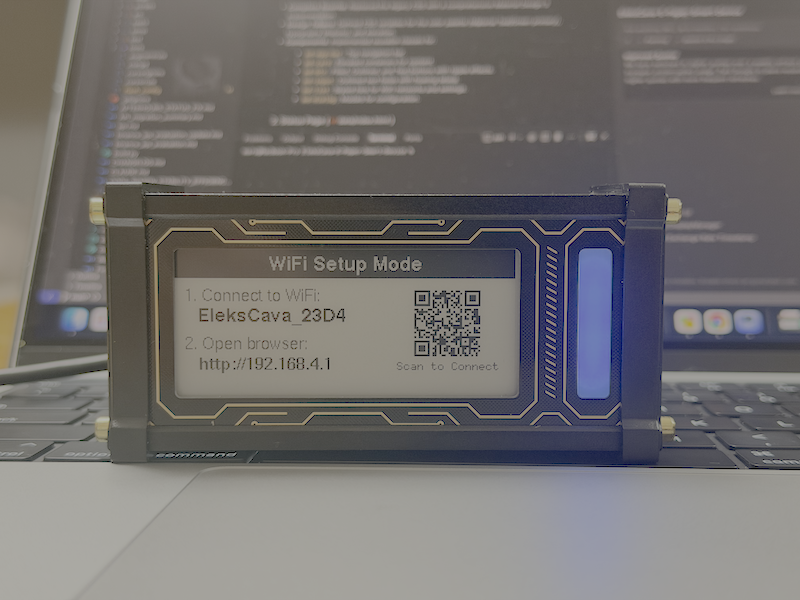
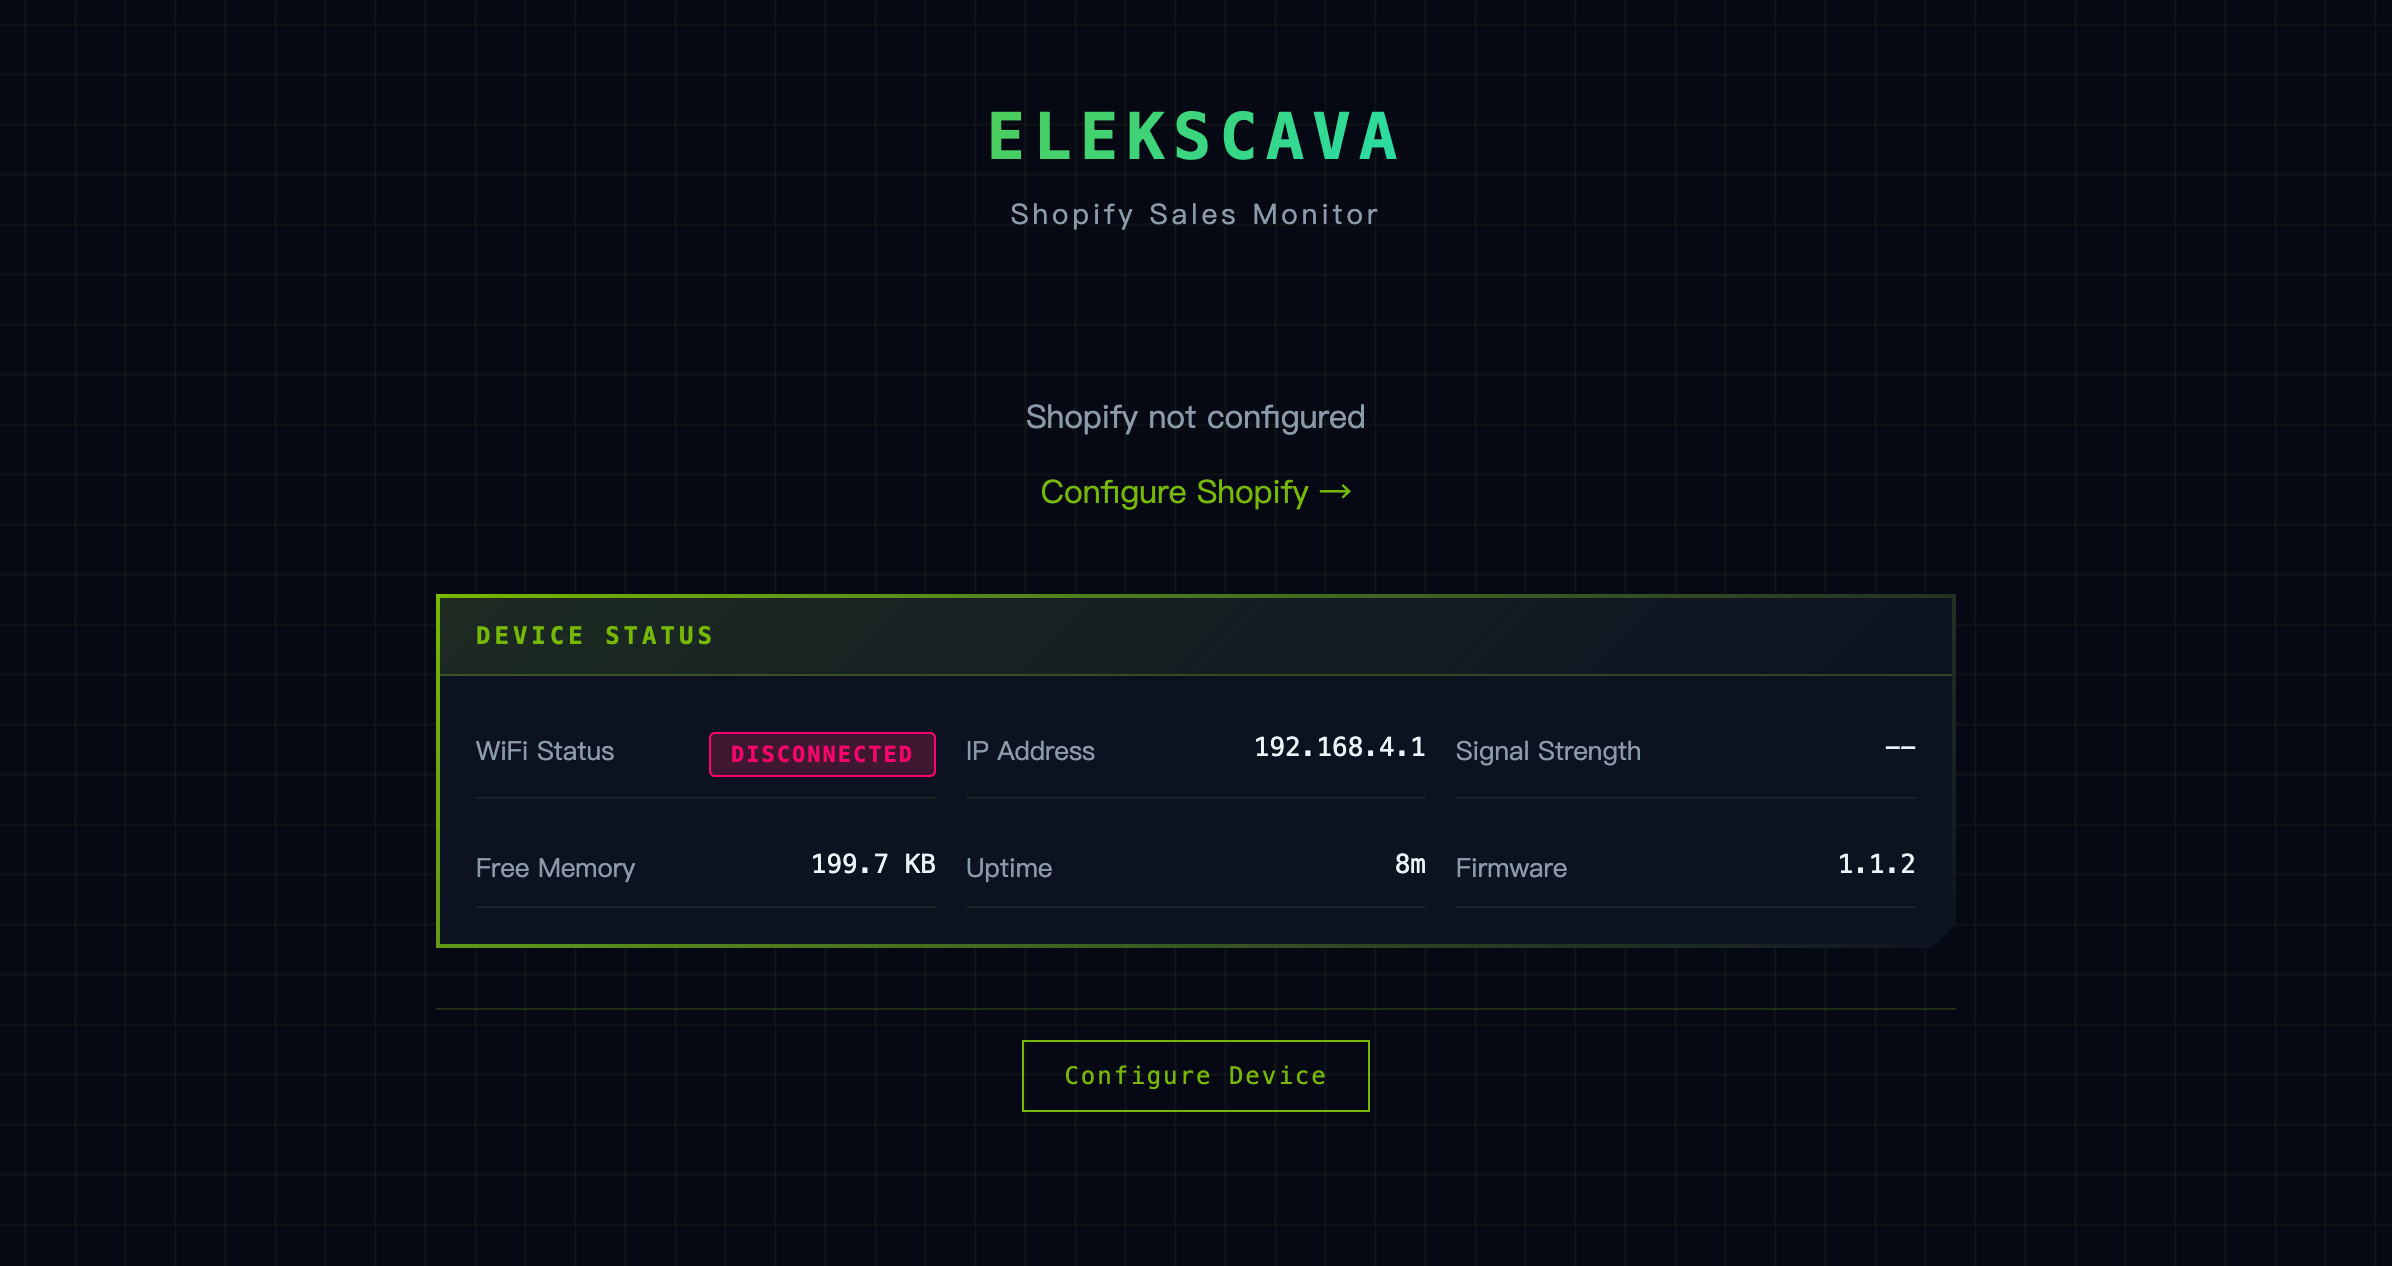
Step 2: Open the Configuration Page
- Open any web browser
- Go to `http://192.168.4.1`
- Alternatively, scan the QR code shown on the device screen
Step 3: Connect to Your Wi-Fi Network
- Click Scan to search for nearby networks
- Select your Wi-Fi network from the list
- Enter your Wi-Fi password
- Click Connect

Note
EleksCava only supports 2.4GHz Wi-Fi networks. If you have a dual-band router, make sure to select the 2.4GHz network.
Step 4: Verify Connection
When successfully connected:
- Screen shows "Connected" with your device's new IP address
- RGB LED turns solid green
- Device plays a confirmation tone
Write down the IP address — you'll need it for the next section.
How to Connect EleksCava to Your Shopify Store
Now that your device is on Wi-Fi, it's time to enter your Shopify credentials.
Step 1: Access the Device Configuration Page
- Ensure your phone/computer is on the same Wi-Fi network as EleksCava
- Open a browser and enter the device's IP address (e.g.,
http://192.168.1.105) - Click Configure or navigate to the Shopify settings section
Step 2: Enter Your Shopify Credentials
Fill in the following fields:
| Field | What to Enter | Example |
|---|---|---|
| Shop Domain | Your Shopify store URL | my-store.myshopify.com |
| Access Token | The token from Step 6 above | shpat_xxx... |
| Poll Interval | How often to refresh data (seconds) | 60 (recommended: 60-300) |

Step 3: Test the Connection
- Click Test Connection
- Wait a few seconds for the result
- You should see "Connection successful" if everything is correct
If you see an error, check the FAQ section below.
Step 4: Save and Start Displaying Sales
- Click Save to store your configuration
- The device will automatically fetch your sales data
- Your e-ink display will update to show today's sales and orders
Congratulations!
Your EleksCava is now connected to your Shopify store!
Frequently Asked Questions
Why does "Test Connection" fail with HTTP 401 error?
Cause: The access token is invalid or doesn't have the correct permissions.
Solution:
- Verify you copied the Admin API access token (starts with
shpat_) - Make sure you didn't accidentally copy the API key or API secret instead
- Confirm the app has read_orders permission enabled
- Check that the app is properly installed (Step 5)
Why won't my device connect to Wi-Fi?
Possible causes and solutions:
| Issue | Solution |
|---|---|
| Using 5GHz network | Switch to 2.4GHz Wi-Fi |
| Wrong password | Double-check your Wi-Fi password |
| Router blocking new devices | Check router's MAC filtering settings |
| Too far from router | Move device closer during setup |
Why does the display show $0 sales when I have orders?
This can happen for several reasons:
- Timezone mismatch — EleksCava uses your Shopify store's timezone. If your store is set to a different timezone, "today" might not match your local time.
- Order status filtering — Only orders with "paid" financial status are counted. Pending or refunded orders are excluded.
- Sync delay — Wait for the next poll interval (check your configured refresh rate).
How do I reset my EleksCava device?
Press and hold the A and C buttons simultaneously for 10 seconds. The device will:
- Clear all saved Wi-Fi credentials
- Clear Shopify configuration
- Restart in AP mode for fresh setup
What do the buttons do?
| Button | Action |
|---|---|
| A | Previous view (cycles through sub-screens in Sales mode) |
| B | Switch mode (Sales → Clock → Device Info → Sales) |
| C | Next view (cycles through sub-screens in Sales mode) |
| A + C (hold 10s) | Factory reset — enters AP configuration mode |
How often does the display update?
The display refreshes based on your configured Poll Interval (default: 60 seconds). The e-ink screen only redraws when new data is received, which helps conserve power.
Need More Help?
If you're still experiencing issues after following this guide, please contact us:
Email: [email protected]
Please include your firmware version (visible on the Device Info screen) and a description of the issue.
Last updated: December 2025